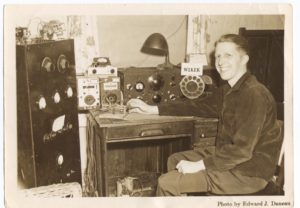
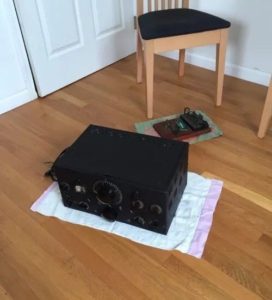
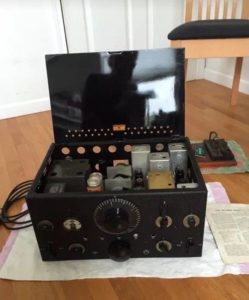
 I left Maine for a small town in New Hampshire, right near the Vermont border. Purpose of the road trip was to pick up this shortwave set from the grandson of the original purchaser back in 1938. For nearly 80 years this radio was with this family. The original owner Richard W1KEK passed away in 2010 and the radio sat in storage until today.
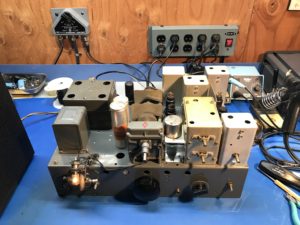
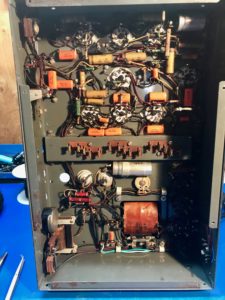
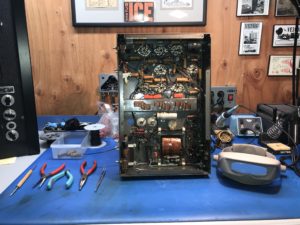
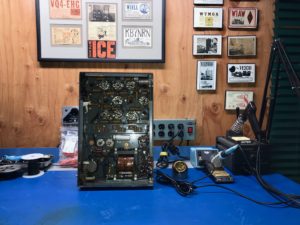
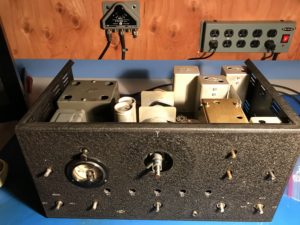
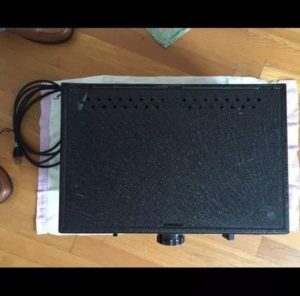
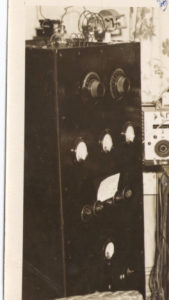
It’s now, along with the original speaker, safely on my workbench. This was to be my fall project, to disassemble, clean, test, and repair where needed, with the goal of getting the set on the air sometime this fall.
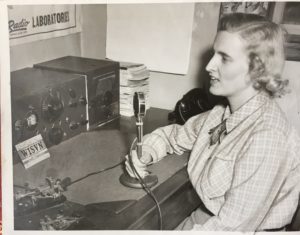
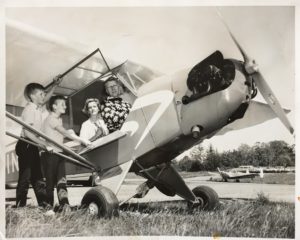
The photos are from Richard as a young man, and later in life.
 |
 |
“My Dad (W1KEK) bought this Receiver in 1938. The photos of him are from 1954 and 2010. It was working perfectly when boxed in 2010. Condition is exceptional as he always kept it dry and covered.”
Sheet Metal and Sliding Coil Removal
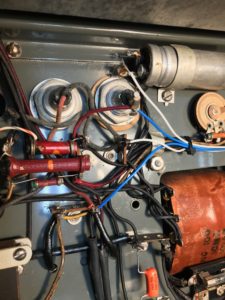
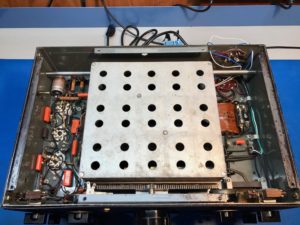
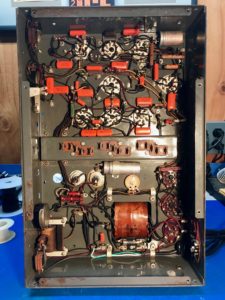
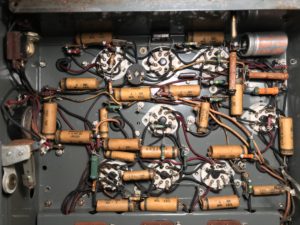
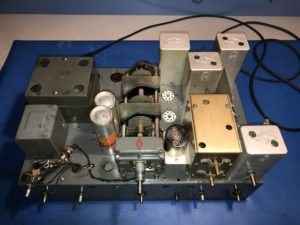
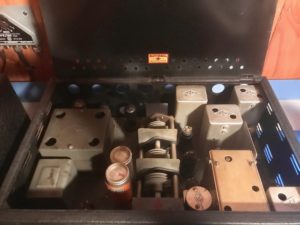
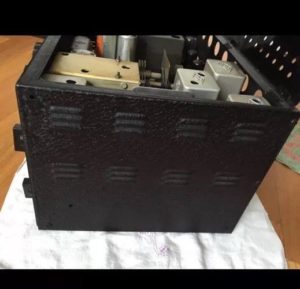
Continued on with the restoration of the National NC-101X today. Removed the sheet metal enclosure, which required removal of all knobs again, then carefully undid the front drive gear, part of the rack and pinion gear set that moves the “catacomb” coil holder from band to band.
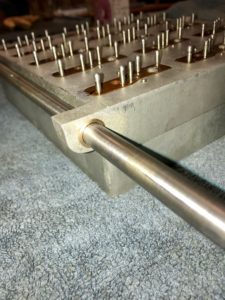
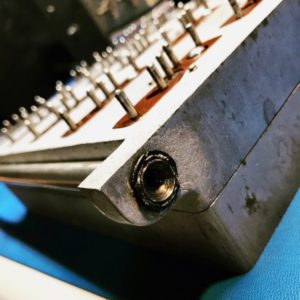
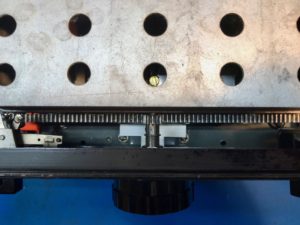
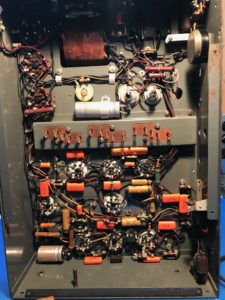
Once the sheet metal was removed, I could access the two large flat head screws on each side of the case, that held the rod on which the catacomb coil slides on. Both screws came out with minimal effort, but removal of the rod was another story. Two large “dimples” on either side of the case go into the countersunk ends of the rod, effectively locking it in place. The side on the left, receiver front facing me, had an additional star washer on it’s end. I debated using some sort of small jack to move the chassis walls apart enough to get the rod to pop out, but was able to do it with some strong “elbow grease” and a large screwdriver. There is a small braided ground wire on the rod that must be detached as well.
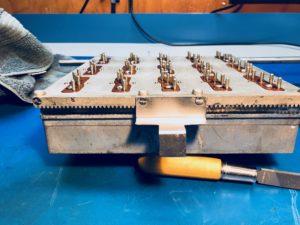
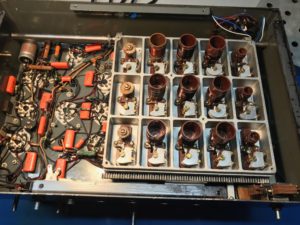
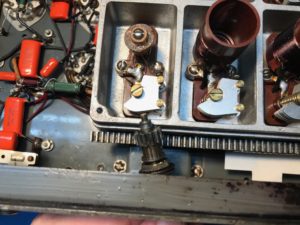
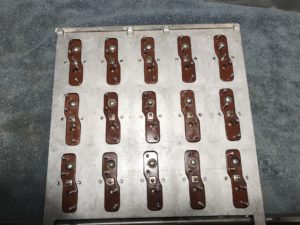
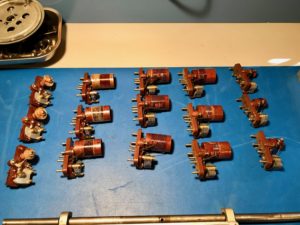
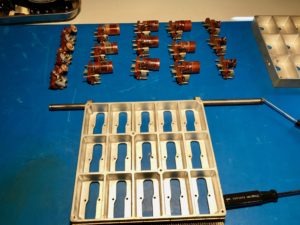
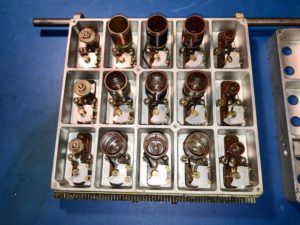
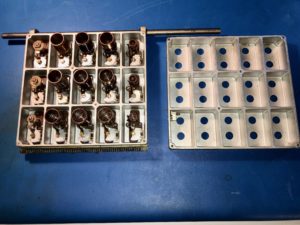
I then removed the sliding coil assembly, often called a “catacomb coil” for cleaning and service. Needed it too, 80 some years of dirt, and old grease build up make it a mess. Once the rod was out, it was a simple matter to remove the lower catacomb cover, and then individually remove each coil, which is really a tuned circuit, consisting of an inductor and air variable capacitor. They were held in by two flat head screws and star washers, to avoid mix up during assembly, I sort in the order they came out, and also used a Sharpie to made a line or dot on each coil to indicate it’s position – 1, 2, 3.
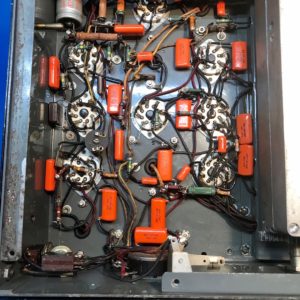
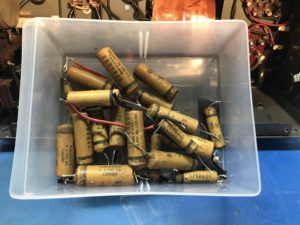
Both halves of the catacomb were then put in the dishwasher to remove the decades of hardened grease and grime that had built up. I cleaned each coil set by hand during assembly. Worked like a charm, the reassembled, and carefully cleaned each coil set, and wiped down the pins with Deoxit. Lubricated the shaft that it slides on, and cleaned on the old nasty hardened grease out of the gear drive on the front. Tomorrow I have to paint the white band indicating tab, and reassembly. Or, I may go after the recap work first, the old wax paper caps aren’t too bad with the catacomb coil set out. Only a total of 21, should be an afternoon’s worth of work.
National NC-101X – Replacing the Catacomb Coil Bushings
While this is for the 101X, most it likely holds true for any of the National moving coil products. What had occurred to this unit, is that the plastic bushings had been brittle, loose and broken over the last 80 years, the coil became unusually binding when I attempted to move it. Concern that I might damage one of the unobtainable coil sets, or the contact fingers, led me to a solution.
 Since National is no more, I figured I could find a current product, and adapt that to the application. McMaster-Carr is an excellent source of such items, and small hardware, and a quick search of their online catalog found several possible candidates. Since the shipping was more than the $5 parts, I ordered two sets of the plastic and one set of the bronze bushings to try.
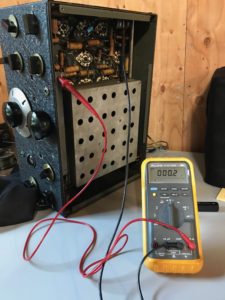
One thing I did have to satisfy myself on, if the coil assembly itself was a ground 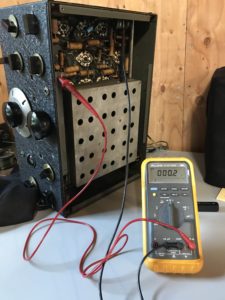 potential. Being insulted by the plastic bushings on the back, and bakelite or fiber centering rings on the front drive gear, I wasn’t sure if the coil housing was actually electrically insulated. Having another NC-101 on hand made it pretty straightforward work, I removed the bottom panel and using a ohm meter verified that there was continuity from ground to the coil assembly itself. I was glad to discover this, because it meant I could use bronze bushings without fear of grounding the sliding coil.
Step by Step Removal of the Sliding Coil Assembly
- The first step is to remove the bottom cover of the unit, this will expose the moving coil.
-
Then the cabinet needs to be removed, which necessitates removal of the knobs, and disconnecting the s meter.
-
The next step is the front rack and gear which moves the coil back-and-forth. You can actually start with this step if you want. There is a nut on the front panel it needs to be loosened and some hardware, including two insulator bushings, that attach a gear to the front panel. You’ll need to remove the top part of the sliding coil housing was necessitates removing six screws, so you can slide the gear up over the housing for removal. With that done, entire sliding coil assembly should lift free of the chassis.
-
With a cabinet removed on the rear the chassis there are two flat head screws which retain the shaft on which the coil rack slides. Removal of the screws may take some effort, they likely been in there for over a years, and you don’t want to strip them out. The use of an impact screwdriver with the proper size bit, would be recommended.
-
Once you have the screws loose on the sides, the rod will still be retained has there are two dimples in the chassis which fit into the countersunk ends of the rod. You’ll also note that there is a small braided ground cable, which is retained to the rod via a small machine screw and nut. Be sure to remove these, before attempting to remove the coil.
-
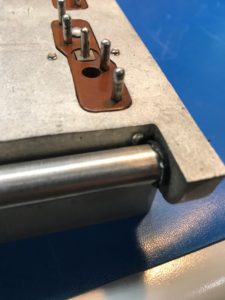
Once you have the braided cable loose, using a large screwdriver carefully pry out the shaft from the counter sunk ends. It will take some effort, but the shaft will finally pop free.
- With the the shaft now for free of the chassis, you can carefully pick the sliding coil rack out from the receiver. I would recommend putting the cover back on the top of the catacomb, just so no stress is put on the fragile coil forms while working with it on the bench.
- In regards to the bushings, you’ll likely find that the bushings size is slightly larger any opening in a moving coil assembly. You’ll need to do one of two things, either machine be opening in a coil assembly to a slightly larger diameter to except the bushings, or machine the bushings to a slightly smaller outside diameter, for a tight press fit into the coil assembly. Either choice is acceptable, since the original bushings lasted 80 years, it is unlikely that replacements will be required again, especially if the bronze style bushing as fitted.
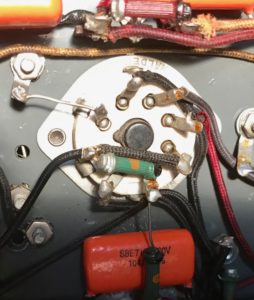
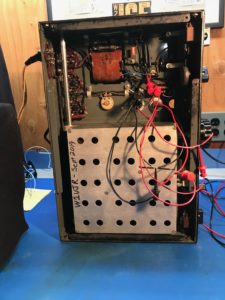
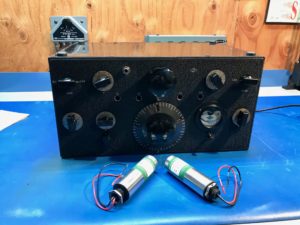
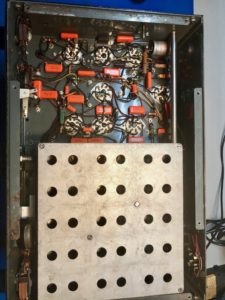
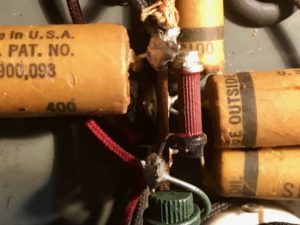
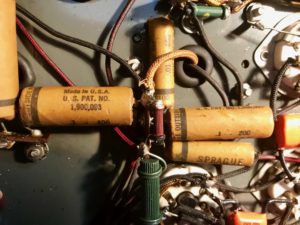
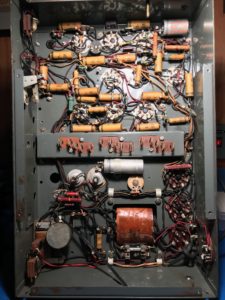
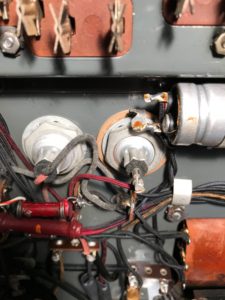
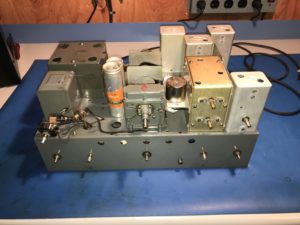
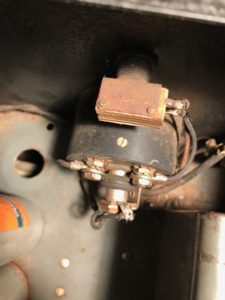
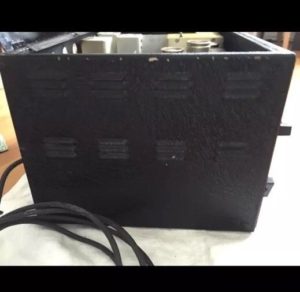
 Progress continues on the National NC-101X project. First real desoldering and parts replacement work. Remove and replaced dry rotted old line cord and chassis feed through grommet. Installed new a three wire line cord, with grounding chassis, for electrical safety.
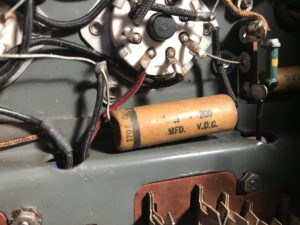
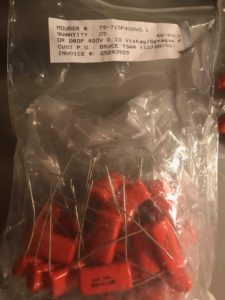
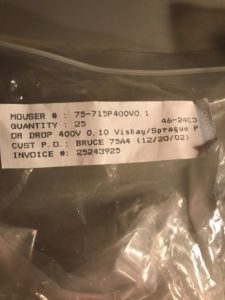
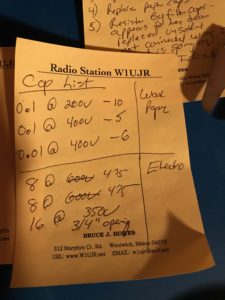
Tomorrow evening I start with replacement of the old wax paper capacitors, 21 total. Then onto the replacement electrolytic, reinstallation of the moving coil assembly, paint some Extend rust convertor on the bare chassis spots, and finish off with an alignment.
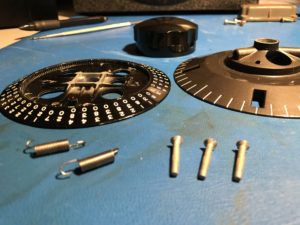
Better, Stronger, Faster – Or Rebuilding the Band Indicator
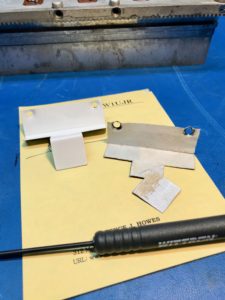
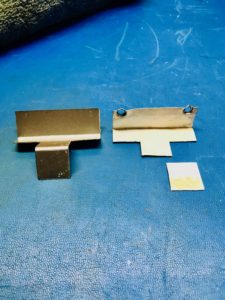
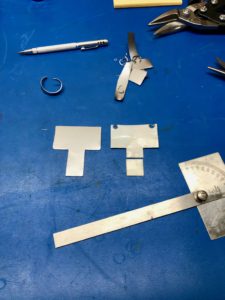 Fabricating a new band indicator became a necessity since spare parts for a 80 year old radio are just not something you can find at your local Radio Shack, if you can even find a Radio Shack.So the old sheet metal, aluminum actually, band indicator, which provides a white dot in each of the band windows as the coil rack moves, was literally falling apart. Given the flimsy nature of the failed unit, I almost wondered if someone made this one.
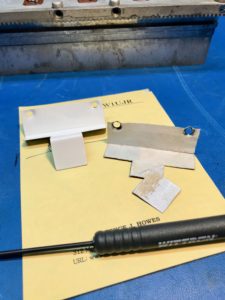
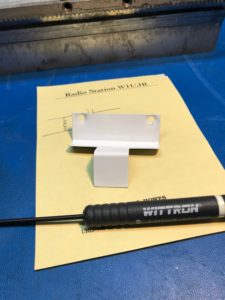
So, one of the final steps on this project, now that the bushings are installed in the moving coil housing, was to fix or fabricate a new band indicator. A trip to my local hardware store yielded me some nice 22ga sheet metal to start the project. Thin enough to work with on the bench with simple hand tools, yet rigid enough to last another 80 years. To get the correct form, I straightened the old one out, and used it as a template for the new replacement, scribing around it.
Carefully I trimmed it out, and then used a file for the final shape and deburring. Several coats of white Krylon did the trick. Better than it was before, better, stronger and faster.
Replacing Coil Housing Bushings – National NC-101X
Here’s the solution to the sliding coil deteriorated bushing problem on the National NC-101X shortwave receiver. Unlike that other National products with “plug in” coils, like the HRO, the early NC-100 series use a “catacomb” coil assembly that slides inside the chassis to switch bands. A very ingenious design, and it works very well..for 80 years or so, and then the plastic bushings deteriorate from age and use.
The chances of finding new old stock bushings is slim to none, and even if they were available, they’d be just as deteriorated as the ones inside my receiver.
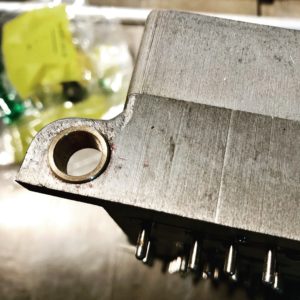
The solution, order a 1/2” to 9/16” bronze bushing from McMaster Carr, machine it down so the outside diameter is .512 inch, press in place using Loctite to retain, ream the ID so the shaft slides through the bushings freely.
 |
 |
I’d like to thank Marc KA2QFX for his very gracious and kind skills in the machine shop, machining the new bushings to fit properly into the sliding coil form.
After two long months, I can finally see the end of the NC-101 project in sight.
Like Butter – Installing And Operating the National Coil Rack
National NC-101X. Testing the newly installed coil rack, with the bronze bushings and fabricated band indicator. Slides like it’s on glass, super smooth and low effort. Very pleased.
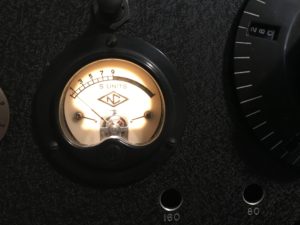
Live To Air – National NC-101X
National NC-101X finally back together tonight newly installed coil rack, with the bronze bushings and fabricated band indicator. Slides like it’s on glass, super smooth and low effort. Listening to the melodious tones of the old Gray Hair Net, using Amplitude Modulation, on 160 meters shortwave. Exact frequency is 1.945 MHz. Not bad for a 80 year old radio, I think the original owner W1KEK would be pleased to know that his treasured set, that he bought back in 1937, has returned to the air. Very pleased with how this project turned out. The audio is very sweet, with some nice wide bandwidth for hifi AM audio. Just waiting for the electrolytic filter capacitors to finish the project.
In Closing
The video below, while somewhat long tells the complete story.
For nearly 80 years this radio was with this family. The original owner Richard W1KEK passed away in 2010 and the radio sat in storage until today. It’s now, along with the original speaker, safely in my ham shack. I’m not so much an owner as I am a caretaker of these wonderful icons of an age gone by.
– Bruce
Photo Gallery – Click On Each To Enlarge


Recent Comments